Intro
Game Engines
Game engines render (display) the world, calculate physics, play sounds, handle lights and more.
They allow developers to focus on making their games rather than having to essentially reinvent the wheel every time.
The focus should be on story and game design (objectives, rules, obstacles, graphics, sounds, etc.).

The most popular ones are Unity and Unreal, both used for developing games for PCs, mobiles, consoles, and more.
Unity
- C# for development
- Easy to learn with an intuitive interface
- Good overall graphics, but less refined than Unreal
Unreal
- C++ for development
- A bit trickier to learn & master
- Photorealistic graphics
Useful resources
Unity's official documentation
Unity's official learning platform
Unity
Pros:
- It’s a good engine for beginners
- Its learning curve is manageable
- It’s free :D
- There are a lot of good tutorials
- It’s fast and rewarding
- It makes portability easier
- It has a large and varied Asset Store
Cool fact (September 2019): 52% of the top 1,000 mobile games were powered by Unity, as well as 60% of all AR/VR content
Games made with Unity
- Cuphead
- Untitled Goose Game
- Hearthstone
- Beat Saber
- Phasmophobia
More here:
- https://unity.com/madewith
- https://www.youtube.com/watch?v=nS07sCf6OLI&feature=emb_logo
- Google, our knowledgeable friend
Install & Setup
In order to most effectively download, install, and manage the versions of Unity on our computer, we will use something called Unity Hub.
Go to https://unity3d.com/get-unity/download and then click to Download Unity Hub.
From your Downloads folder, double-click on the Unity Hub Setup file to begin the installation.
Agree to Unity Terms of Service and follow the instructions to install Unity Hub.
Open Unity Hub.
Now that Unity Hub is set up, we need to actually install a new version of Unity and our code editor, Visual Studio.
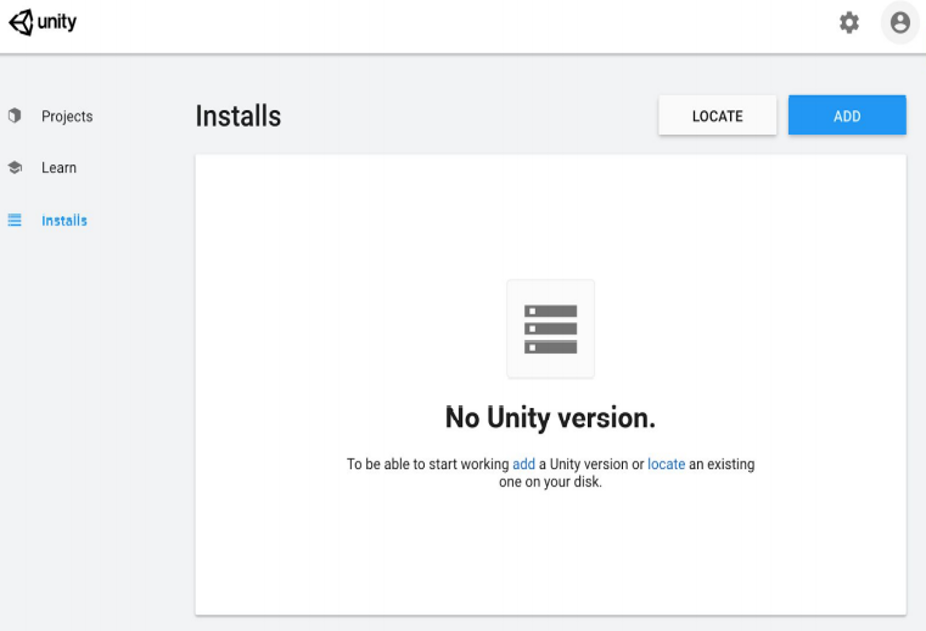
In the Installs tab click to Add a new Unity Version.
Choose the desired version. We will use 2021.3.27f.
Choose to also install Visual Studio for now (not VS Code).
Accept any necessary terms and conditions and begin installation.
You can continue onto next step of creating a Unity ID while it is installing.
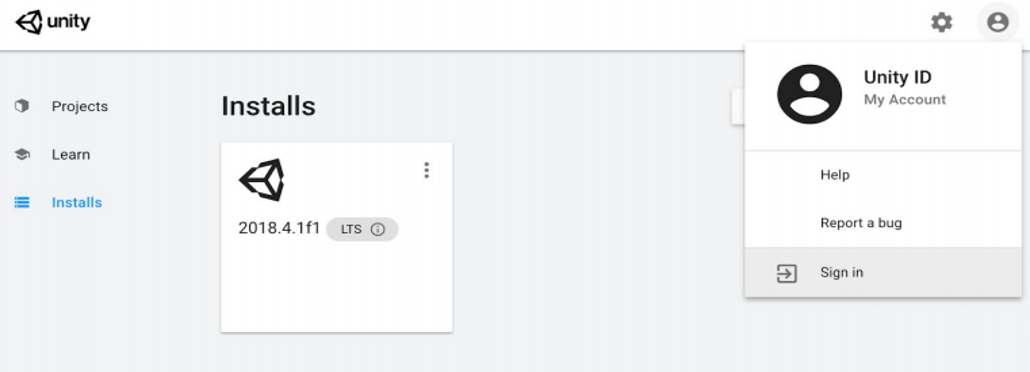
In order to access a lot of important Unity services, including the Unity Asset Store, we need to be signed in with a Unity ID.
From the Account menu in Unity Hub, click to Sign in and follow the instructions.
If you already have an account, fill in your credentials.
Unity's UI: Overview
When opening Unity, this is what we see:
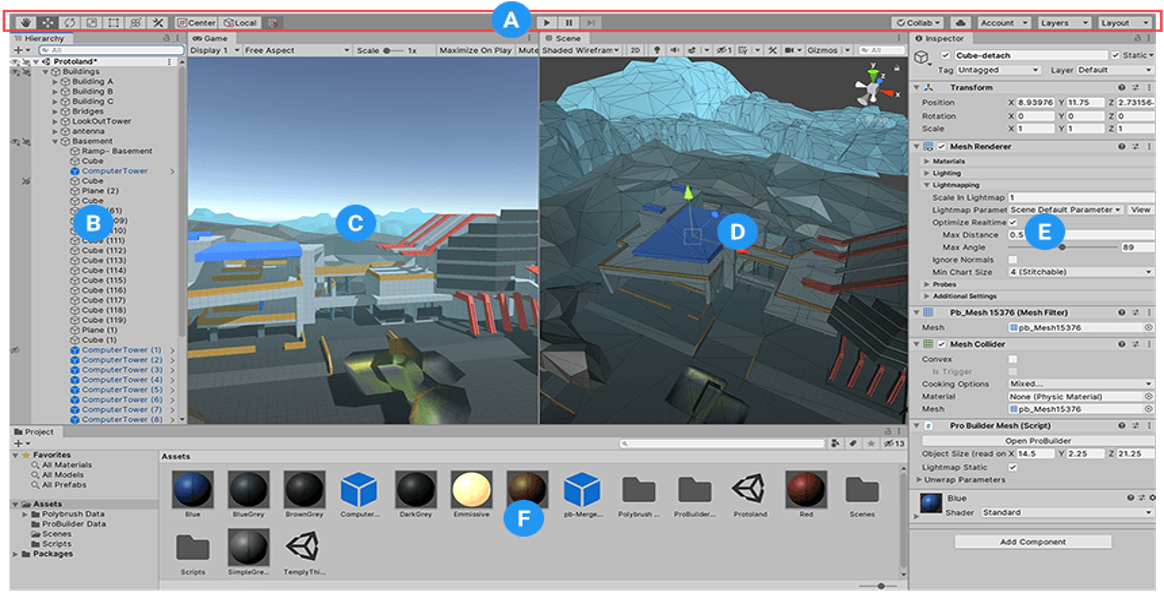
We can divide Unity's user interface (UI) into different windows/views, as follows:
(A) The Toolbar
(B) The Hierarchy window
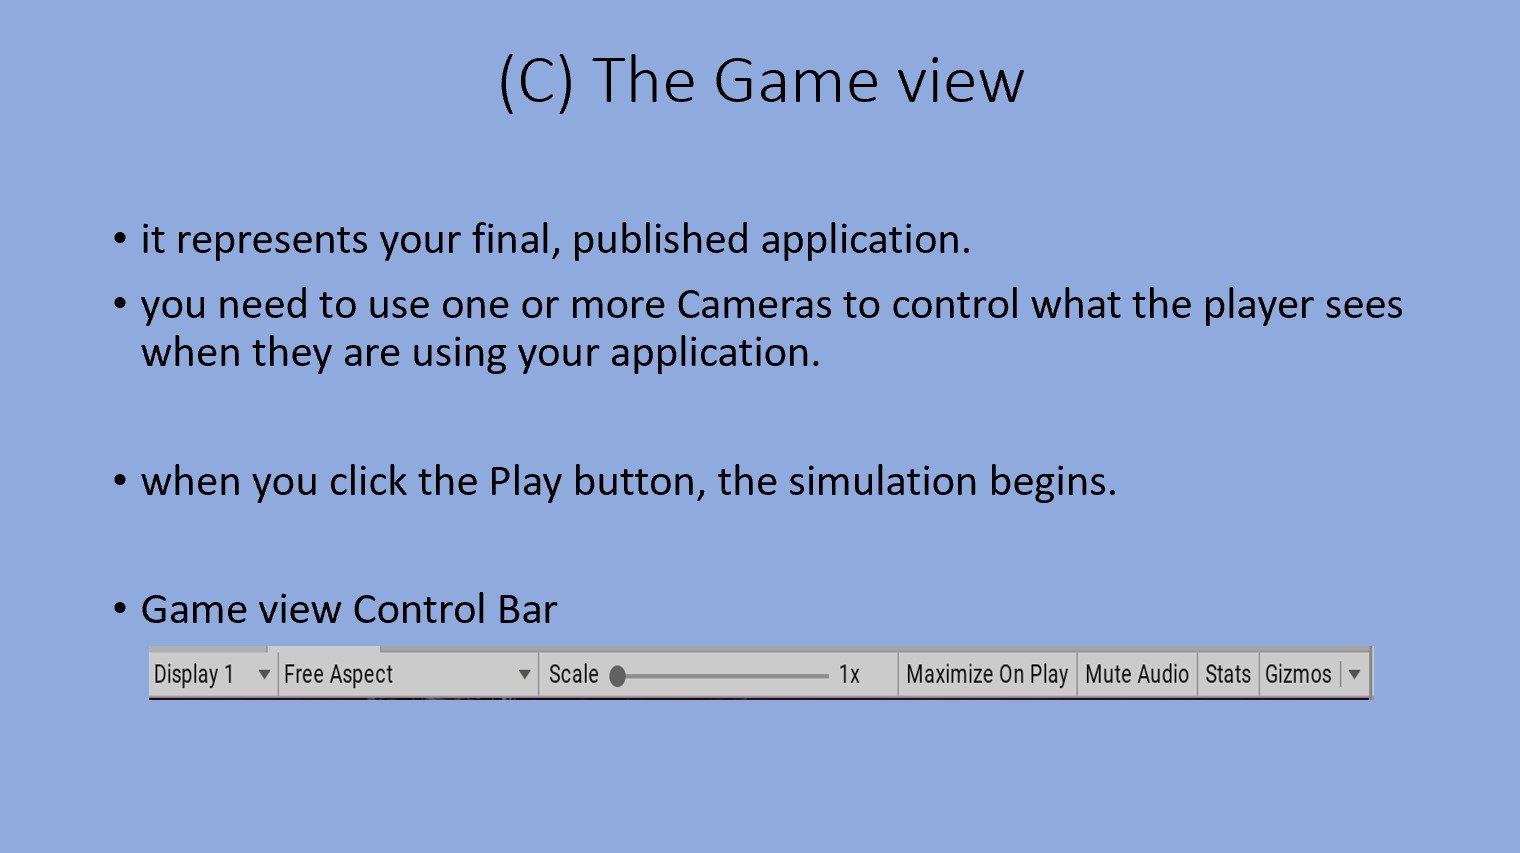
(C) The Game view
(D) The Scene view
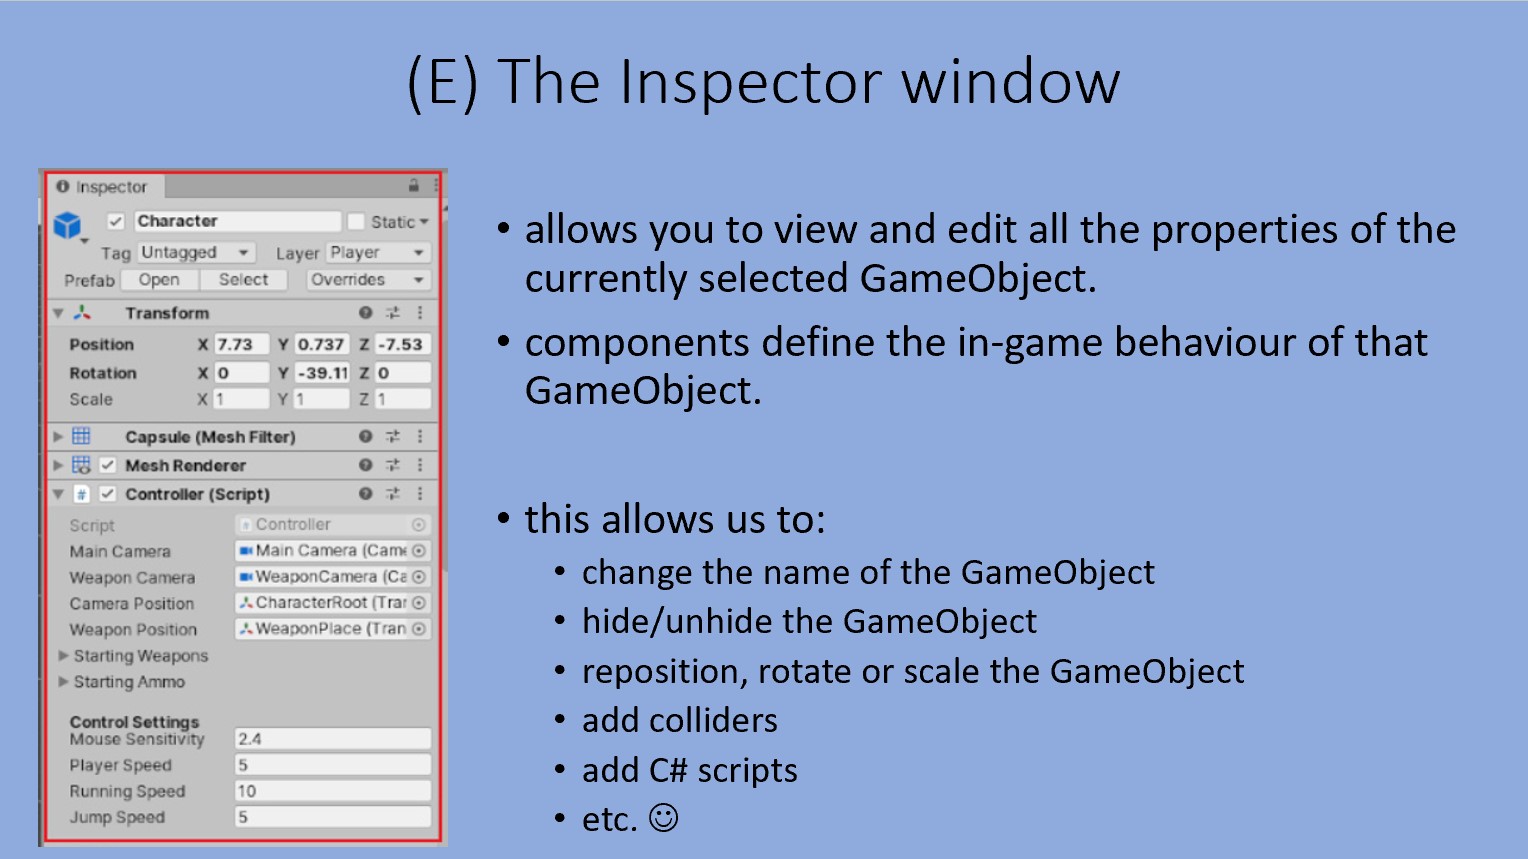
(E) The Inspector window
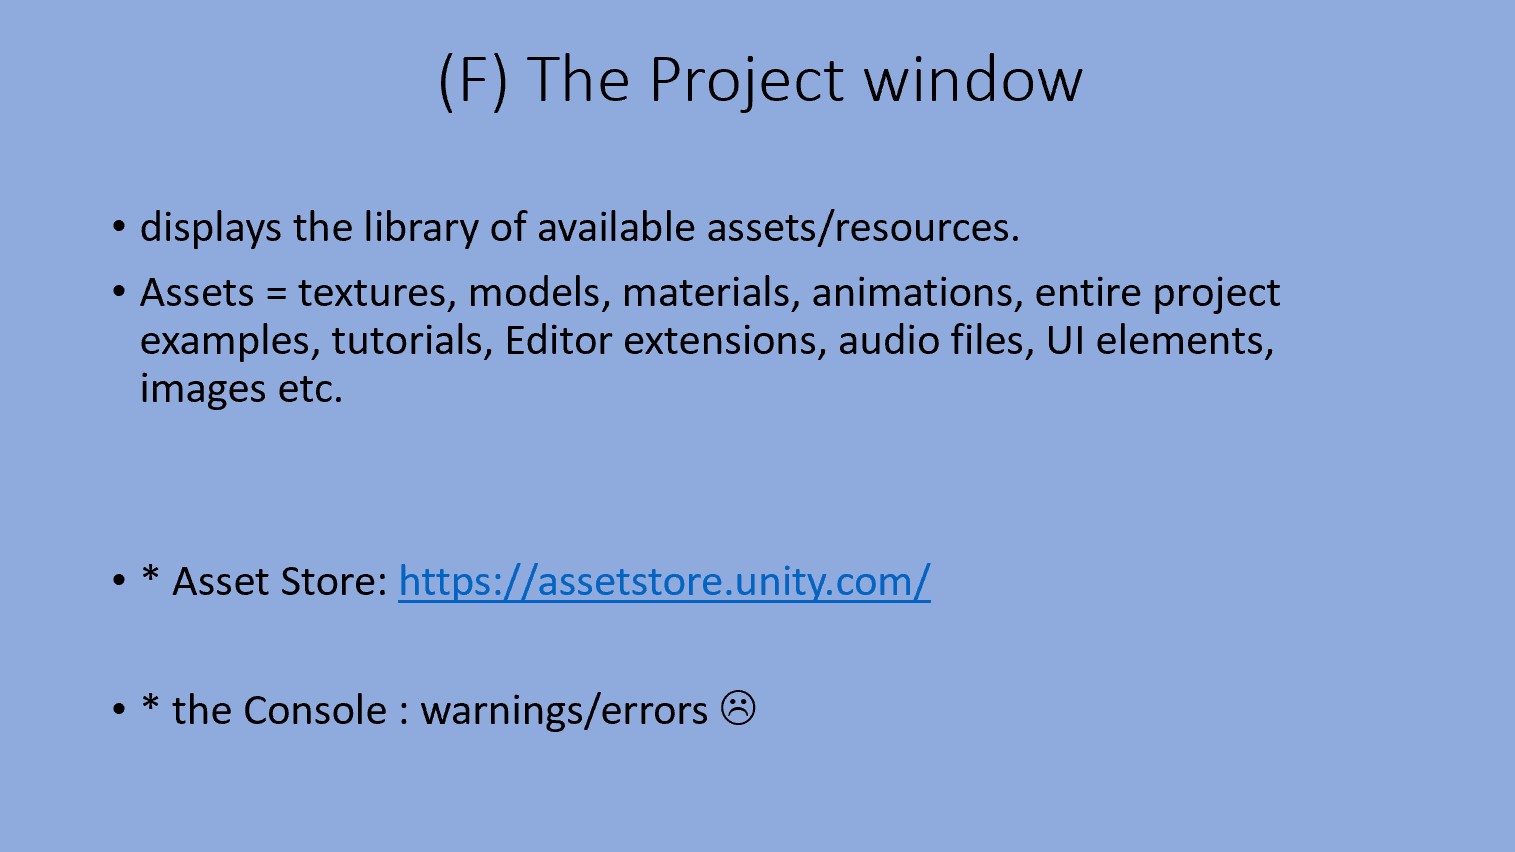
(F) The Project window
Unity's Windows
(A) The Toolbar = bara de sus
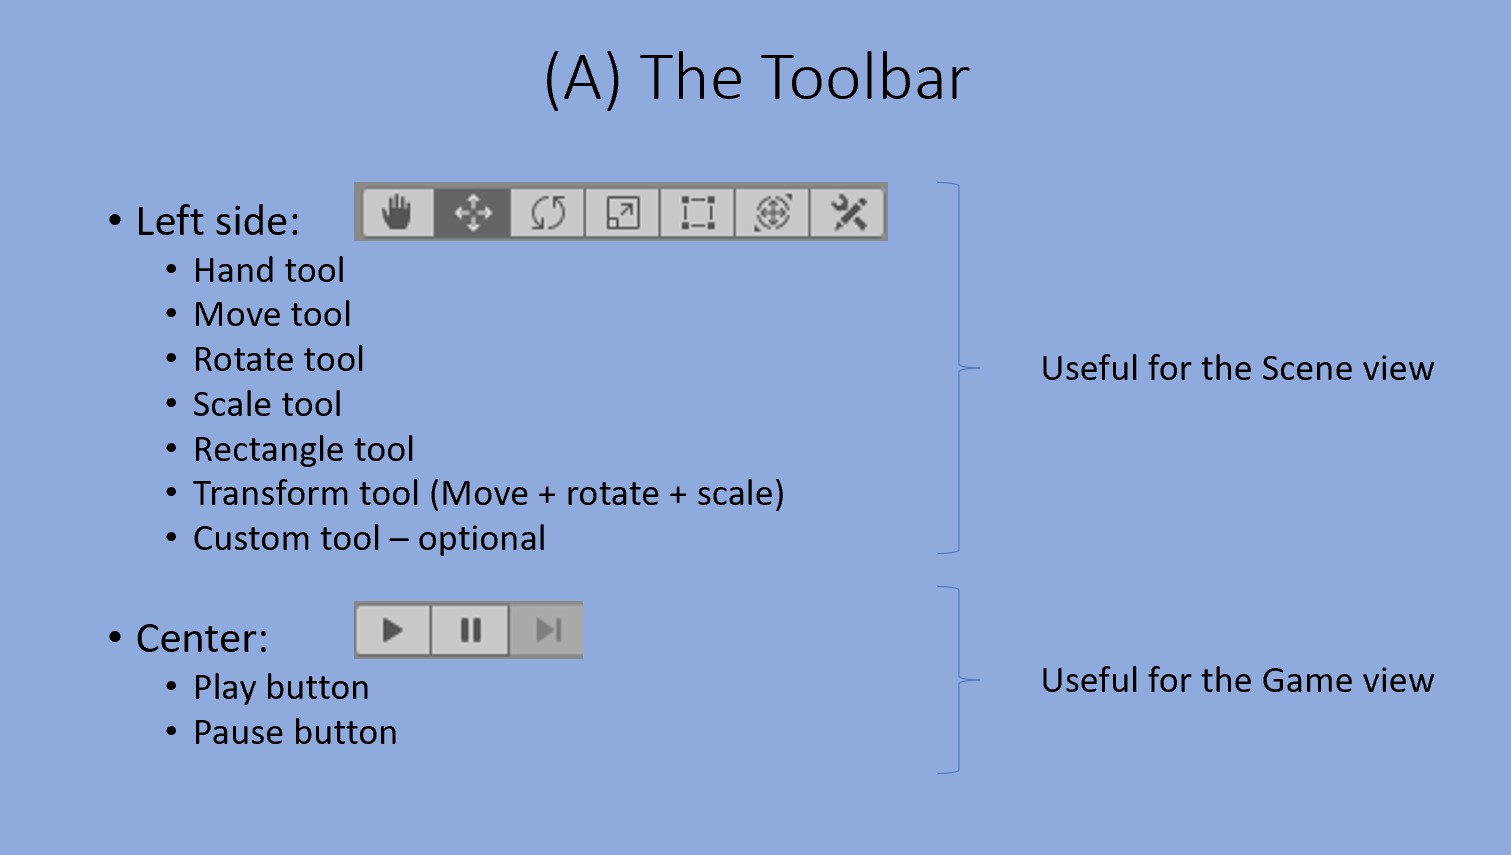
Play - starts the game simulation.
(B) The Hierarchy window = ierarhia - in stanga
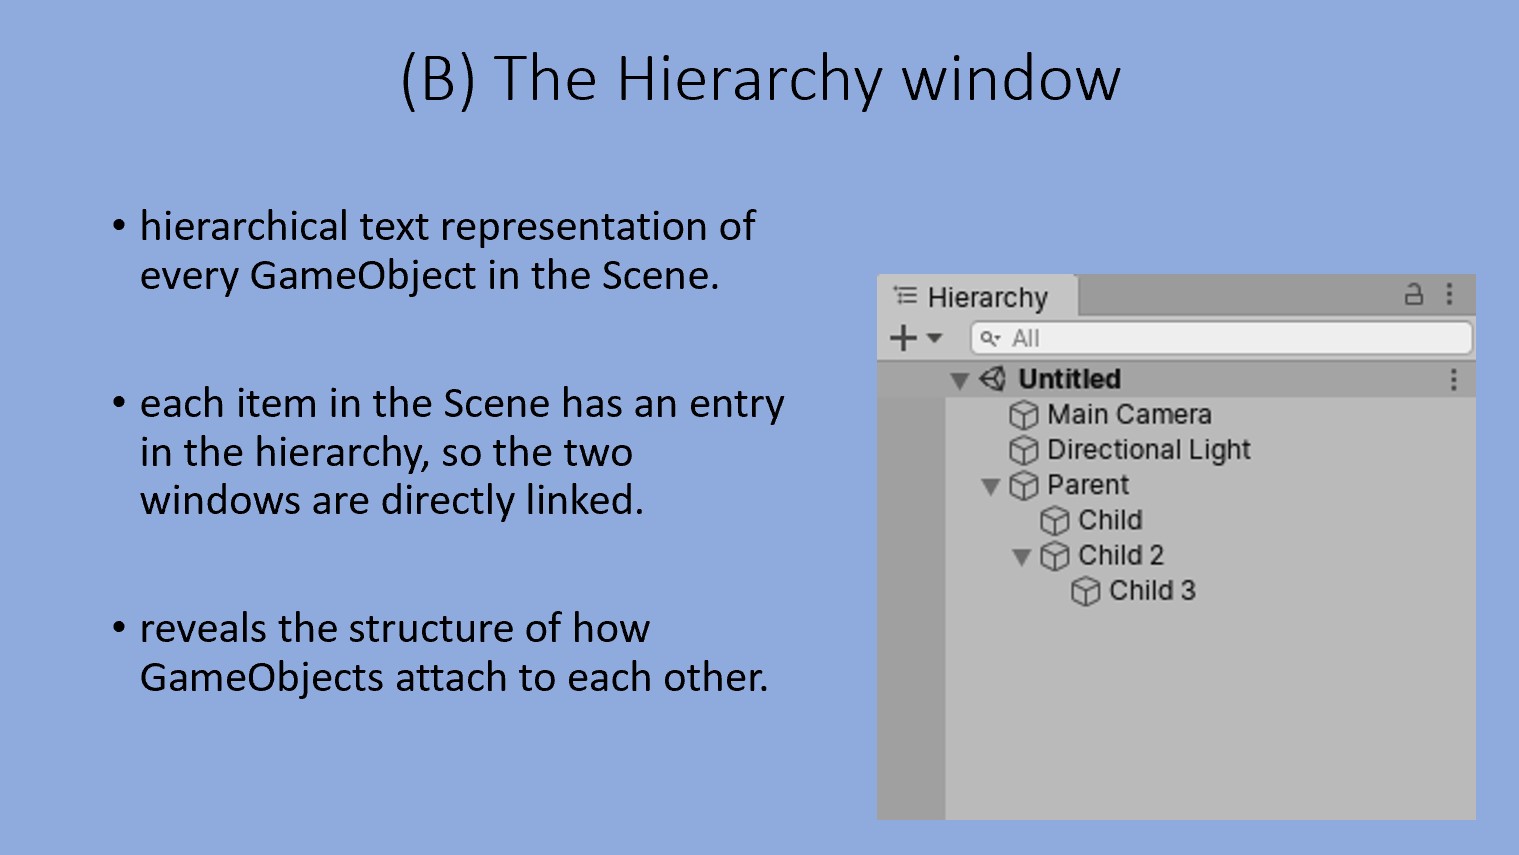
The Hierarchy and the Scene are synchronised: if we add an object in the Scene, Unity will automatically create a list entry for it in the Hierarchy.
(C) The Game view - pe centru
(D) The Scene view - pe centru
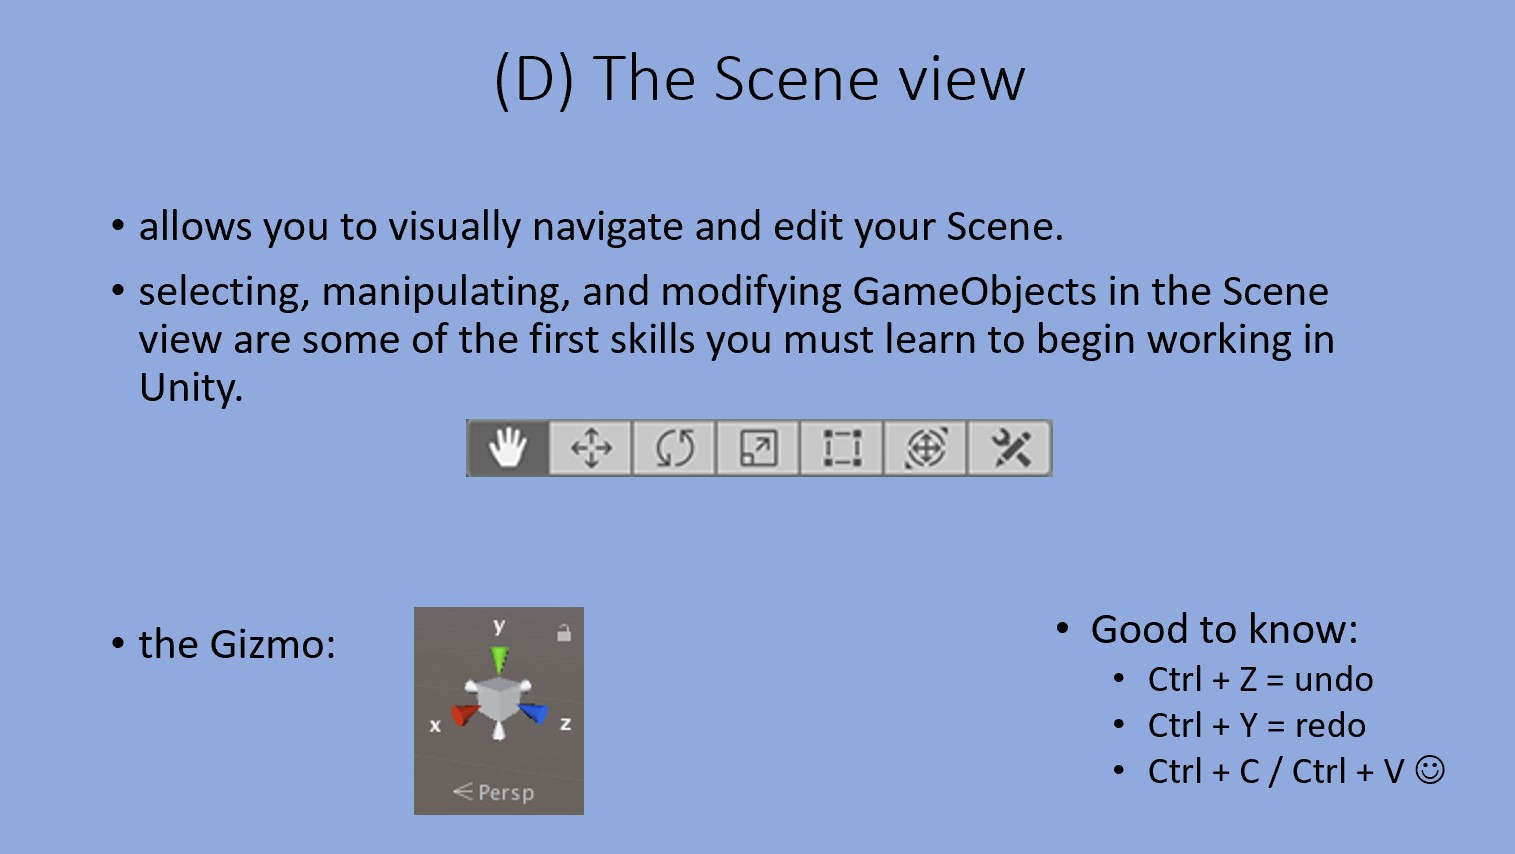
The Scene Gizmo appears in the upper-right corner of the Scene view. This displays the Scene view Camera’s current orientation, and allows you to change the viewing angle and projection mode.
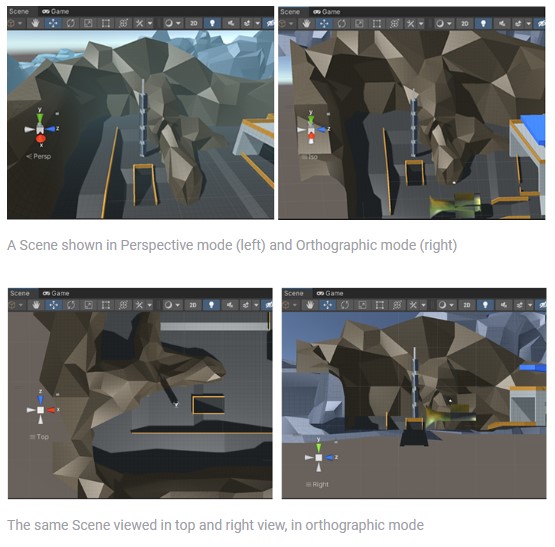
The Scene Gizmo has a conical arm on each side of the cube. The arms at the forefront are labelled X, Y, and Z. Click on any of the conical axis arms to snap the Scene view Camera to the axis it represents (for example: top view, left view, and front view). You can also right-click the cube to see a menu with a list of viewing angles. To return to the default viewing angle, right-click the Scene Gizmo and select Free.
You can also toggle Perspective on and off. This changes the projection mode of the Scene view between Perspective and Orthographic (sometimes called “isometric”). To do this, click the cube in the center of the Scene Gizmo, or the text below it. The Orthographic view has no perspective, and is useful in combination with clicking one of the conical axis arms to get a front, top or side elevation.
(E) The Inspector window - in dreapta
(F) The Project window - jos
Hotkeys & Navigation
Hotkeys
These are the most popular default Unity keyboard shortcuts:
- Q (pan = hand tool)
- W (move)
- E (rotate)
- R (scale)
- T (rectangle tool)

- F (focus GameObject)
- ctrl + Z (undo)
- ctrl + Y (redo)
- ctrl + X (cut)
- ctrl + C (copy)
- ctrl + V (paste)
- ctrl + D (duplicate)
- ctrl + P (play)
- ctrl + shift + P (pause)
- shift + del (delete)
- //multiple selection with shift or ctrl in hierarchy
You can find more here, for example.
Navigation in Scene View
Hand tool
When the Hand tool is selected, the following mouse controls are available:
- Hand tool (Q) - click and drag to pan the Camera around
- Hold Alt + left-click and drag to orbit the Camera around the current pivot point. This option is not available in 2D mode, because the view is orthographic.
- Hold Alt + right-click and drag to zoom the Scene view.
Hold down Shift to increase the rate of movement and zooming.
Flythrough mode
Use Flythrough mode to navigate the Scene view by flying around in first-person, similar to how you would navigate in many games.
To enter Flythrough mode and navigate through the Scene view in Flythrough mode:
- Click and hold the right mouse button.
- Do the following to navigate (fly) through the Scene view:
- Use your mouse to move the view.
- To move forward or backward, press W or S.
- To move left or right, press A or D.
- To move up or down, press Q or E.
- To move faster, press and hold Shift.
Flythrough mode is designed for Perspective Mode. In Orthographic Mode, holding down the right mouse button and moving the mouse orbits the Camera instead.
More info about hotkeys & navigation here.
Our first project
To-do
Create a 3D empty project using Unity Hub.
Add a cube to your Scene.
Test the Scene tools (hand, move, rotate etc.) & the navigation methods.
Test the Game view. Move & rotate the camera to see the cube.
Access the Asset Store: open a web browser and go to https://assetstore.unity.com/.
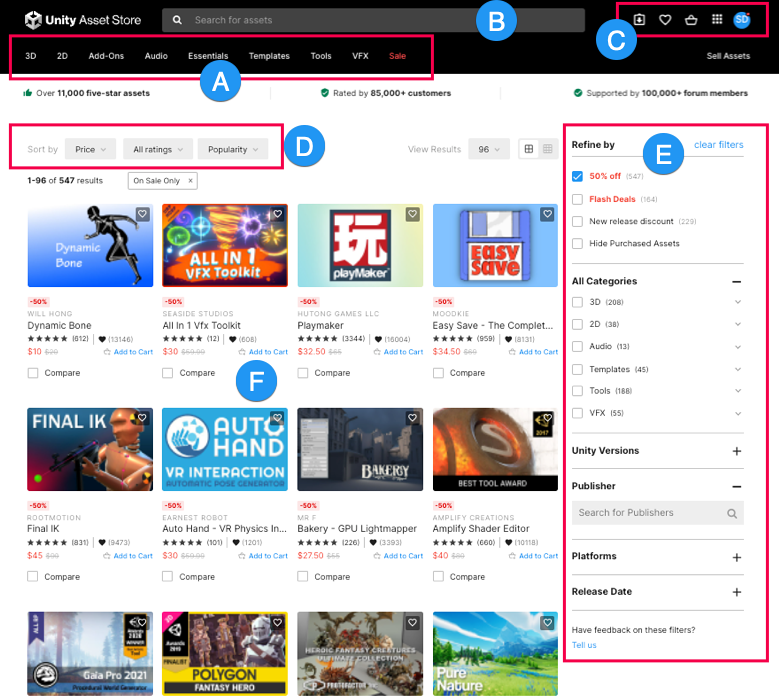
Import this armchair to your project and add it to your Scene.
Create new Materials and drag & drop them to your armchair.
Experiment a bit on your own and ask questions :)
Homework
Using only free 3D objects from the Asset Store to populate the scene, create a nice environment & come up with a context/story for it.
E.g.: Add a big fancy library, a ton of books, two tables, some random candles, a fluffy rug and a hidden cat, and say that this is the home office of our main character, Mr. Louis, who is a best-selling author. His only family is his cat, Lady Chuckles, that loves taking naps next to him while he works...
Note: Exercise navigating through the scene & manipulating objects: rotate them, change their sizes, experiment with materials etc. Be as creative as possible while designing the scene & have fun! <3